As you use Online Proofing to display and sell images to your clients, you may want to make it easier for your clients and prospective clients to access your Proofing Sets from your website. The Proofing Set widget allows you to do just that. Using the Hero Image of each Proofing set as a thumbnail, it displays your Proofing Sets on your chosen page in chronological order. You have five options over the layout. You may also choose to omit any particular Proofing Set from appearing on your website.
Adding The Proofing Set Widget To Your Page
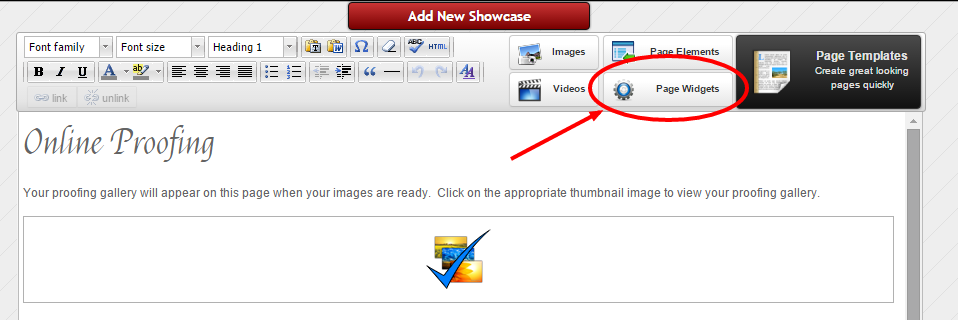
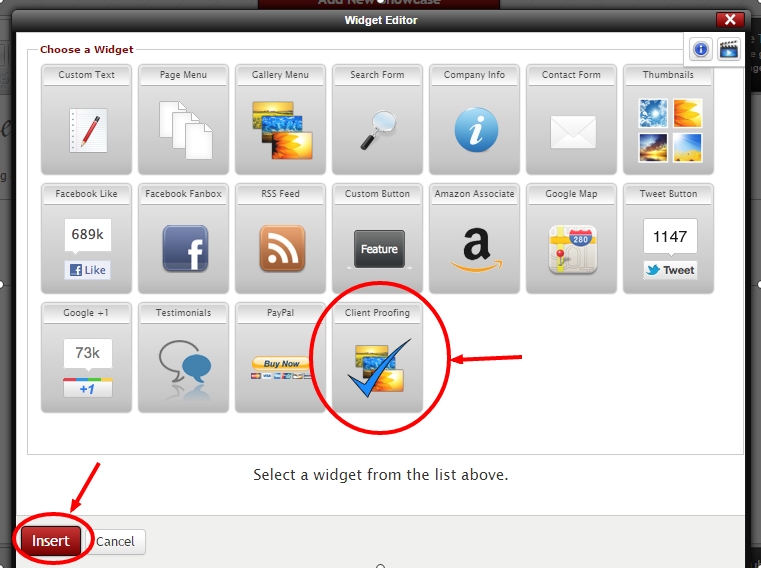
After creating a new page (or editing an existing page), click on “Page Widgets” to bring up the widget options and add the Proofing Set Widget. The primary option on the widget is the layout options. Choose your style preference and click on insert widget.
1. Click on “Page Widgets” in the Page Layout Editor

Once in the Page editor, click on “Page Widgets”
2. Add The Proofing Set widget and Click on Insert.

Add the Proofing Set Widget to your Page
More on adding widgets to pages
Proofing Set Options
The Proofing Set Widget lets you decide how your Sets will display on your site. You can display thumbnail images that link to the Proofing Sets in one, two, three, or four columns. The layout is completely up to your preference. There is also the option to display “Text Only” links to your Proofing Sets. (see layout examples below)
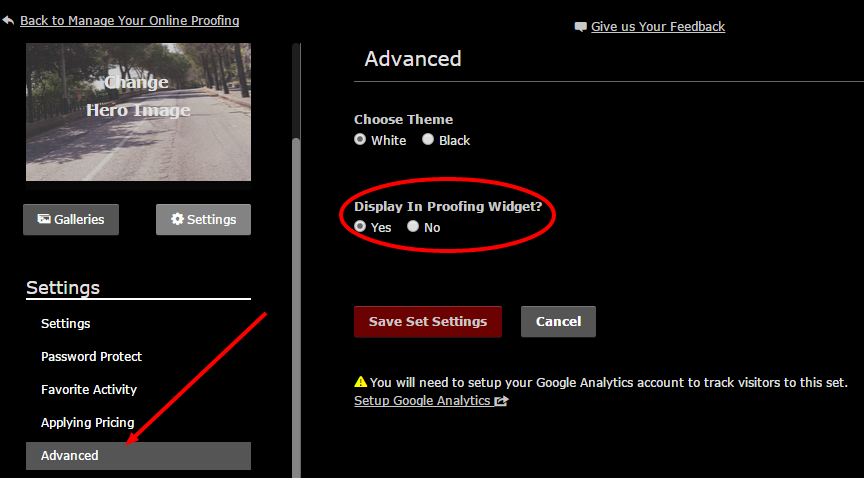
There might also be cases where you don’t want a particular proofing set appearing on your website through the Proofing Set widget. You have the ability to prevent a Proofing Set from appearing in your widget (and displaying on your site) through the advanced settings in the Proofing Set Administration. (see graphic directly below)

Prevent a specific Proofing Set from displaying on your website.
Proofing Set Layout Examples
1. Single Column. Large images that make a great impact. Best to use if you don’t have too many Proofing sets to display (otherwise your page may scroll for a long time and your visitor may tire of doing this). Live Example – 1 Column

One Column Proofing Set Example
2. Two columns. Live Example – 2 Columns

Two Column Proofing Example
3. Three Columns. This is the default setting when you add the Proofing Set widget to your page. Live Example – 3 Columns

4. Four Columns. A good option once you have created several proofing sets. Live Example – 4 Columns

Four Columns
5. Text Only. If you prefer, you can choose to display your proofing sets as simple text links. Live Example – text only
