You can choose between four different types of Header layouts for your website:

Native Header

Top Fixed Header

Left Fixed Header
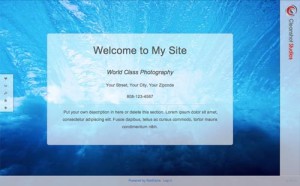
Right Fixed Header
There are two ways you can change your Header layout: through the Appearance Editor or through the Appearance & Settings area.
In the Appearance Editor
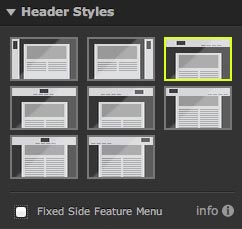
Header Style Icons in the Appearance Editor
To change your Header layout using the Real-time Appearance Editor:
- Click Appearance in the Menu Bar
to open the Appearance Editor. - Click the Header Styles tab.
- Click one of the icons that appears below to choose a Header layout. This allows you to quickly choose from one of Redframe’s header settings configurations and preview the result in real time.
- Check Fixed Side Feature Menu to fix the Feature Menu to the side of your website. If unchecked, the Feature Menu will be positioned at the top of your Header. Read Change the location of your Feature Menu for more information.
- Click Save Changes to apply the new Header layout to your website.
In Manage Settings
To change your Header layout in Manage Settings:
- Click Manage in the Top Menu.
- Under Pages & Settings heading, click Manage Settings
- Click the Header tab.
- Click the Manage Header Layout button to reveal the Features settings
- In the Header Layout Type setting, click either Default, Top Fixed, Left Fixed, or Right Fixed.
- Click the Submit Changes button below to apply your new Header layout to your website.