The Following Article has 3 sections: (1) Adding a New Page Image, (2) Editing an Existing Page Image and (3) Deleting an Existing Page Image
To Add/Edit images on a Page, you can either upload new images from your hard-drive, or use previously uploaded Page or Gallery images – which are stored and accessed easily in the page editor for your convenience.
If you are going to be adding lots of images to a page, in order to get a uniformed look and to insure proper alignment and/or insure your images are all the same size, we suggest you use/insert a Page Element for Images first before uploading or inserting images. Click here for information about page elements.
(1) Via Redframe Site Editor – Adding a New Page Image
1. From the Redframe Site Editor – navigate to the page you want to edit (example: Home)
2. click the blue button “Edit this Page” in the Top Menu

3. click “Edit Main Page” from the drop down graphic
4. Within the page itself, place your cursor where you want the image to be
placed or be inserted, and then click ‘images’ near the top of the
page.

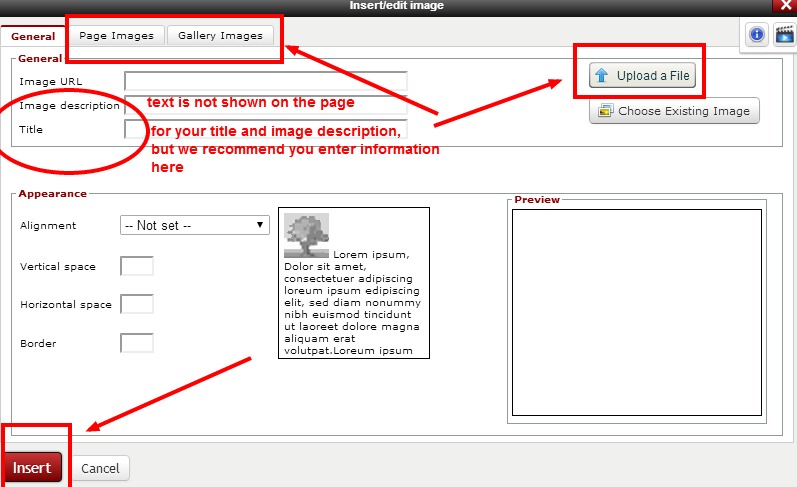
5. On the next screen Click ‘Upload a File’ – (if uploading a new file from your hard-drive) or ‘Page Images’ or ‘Gallery Images’ if using previously uploaded image – and ‘select’ the image you want to be inserted
6. Enter Image Description and Title (optional) and choose ‘Alignment’ (optional)
7. Click Insert
(2) Via Redframe Site Editor – Editing an Existing Page Image or Replacing our Demo Page Images
1. From the Redframe Site Editor – navigate to the page you want to edit (example: Home)
2. click the blue button “Edit this Page” in the Top Menu
3. click “Edit Main Page” from the drop down graphic
4. Click your mouse on the image you want to edit or replace – then click the camera icon that appears in the upper left corner

5. On the next screen Click ‘Upload a File’ – (if uploading a new file from your hard-drive) or ‘Page Images’ or ‘Gallery Images’ if using previously uploaded image – and ‘select’ the image you want to be inserted
6. Enter Image Description and Title (optional) and choose ‘Alignment’ (optional)
7. Click Insert
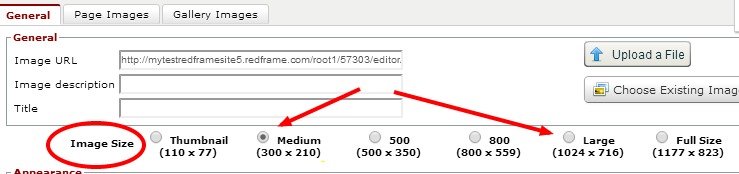
NOTE 1: Distorted image If your image is distorted after viewing in the real time editor or in edit mode, it is most likely because the box that holds the image is set to a certain size and the image size you chose (thumbnail) is not large enough. Thus, the image was stretched to fit the available space. Usually ‘medium’ or ‘large’ – NOT thumbnail works best. You will see these options when
NOTE 2: BorderTo add a ‘border’ to your image enter the numeric value for the size of border you would like. These values are small, and ‘5’ will give you a thin border. You are not able to change the ‘color’ of the border in the page editor, as the image border colors are determined by the ‘Color Styles’ you chose for your website and the accent color per-programmed for that color style.
(3) Via Redframe Site Editor – Deleting a Page Image
1. From the Redframe Site Editor – navigate to the page you want to revert (example: Home)
2. click the blue button “Edit this Page” in the Top Menu then click “Edit Main Page” from the drop down graphic
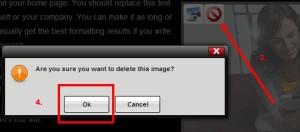
3. Click your mouse on the image you want to delete – then click the red circle with a line through it that appears in the upper left corner
4. Click ‘ok’ for when asked “Are you sure you want to delete this image?”
Note: This will only delete the image from the page, but will not delete it from the ‘gallery images’ or ‘page images’ area.